
Documentation Index
Fetch the complete documentation index at: https://docs.teli.ai/llms.txt
Use this file to discover all available pages before exploring further.
Step 1
Click on the “Trigger” step in the Zapier workflow and type in “Teli AI” in the search bar.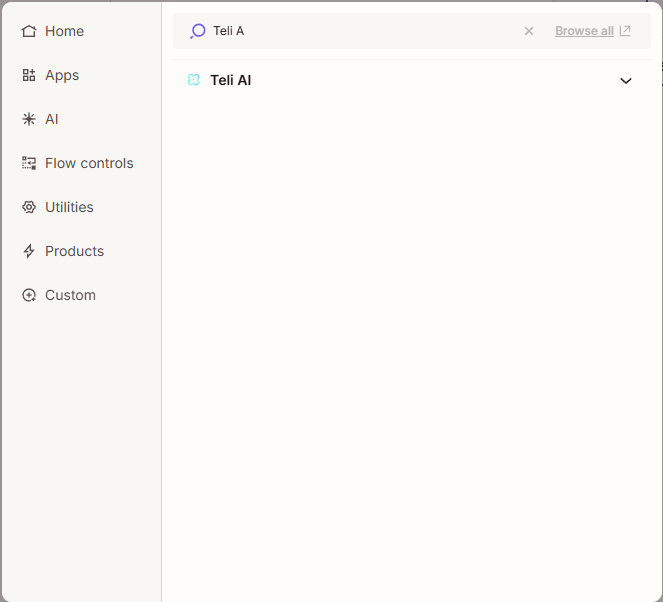
Step 2
Click “Account” and sign in to your Teli AI account
Step 3
Click the “Trigger event” menu options and select “Completed Call Data”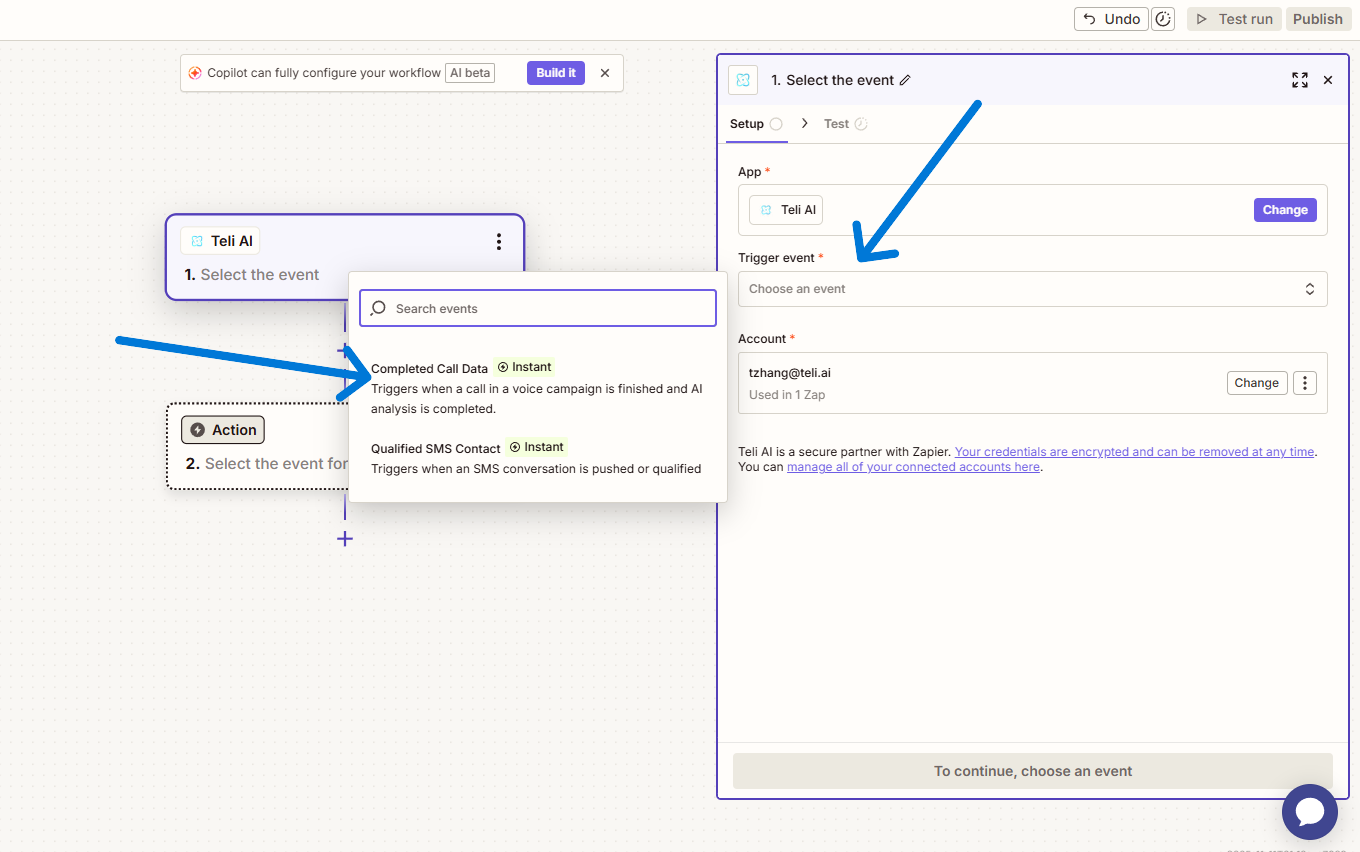
Step 4
Click on the “Configure” tab where you will name your integration. (Note: The integration name does not prevent duplicate names.)
Step 5
When in the “Configure” after you’ve named your integration, you will then select the voice agent this integration will be for. Click the “Completed Call Data Example” dropdown and you should see a list with all of your current active voice agents. (Notes: If you do not see any agents or the agent you’re looking for, be sure to double check your Teli account that your agents are deployed and the status says “Active”)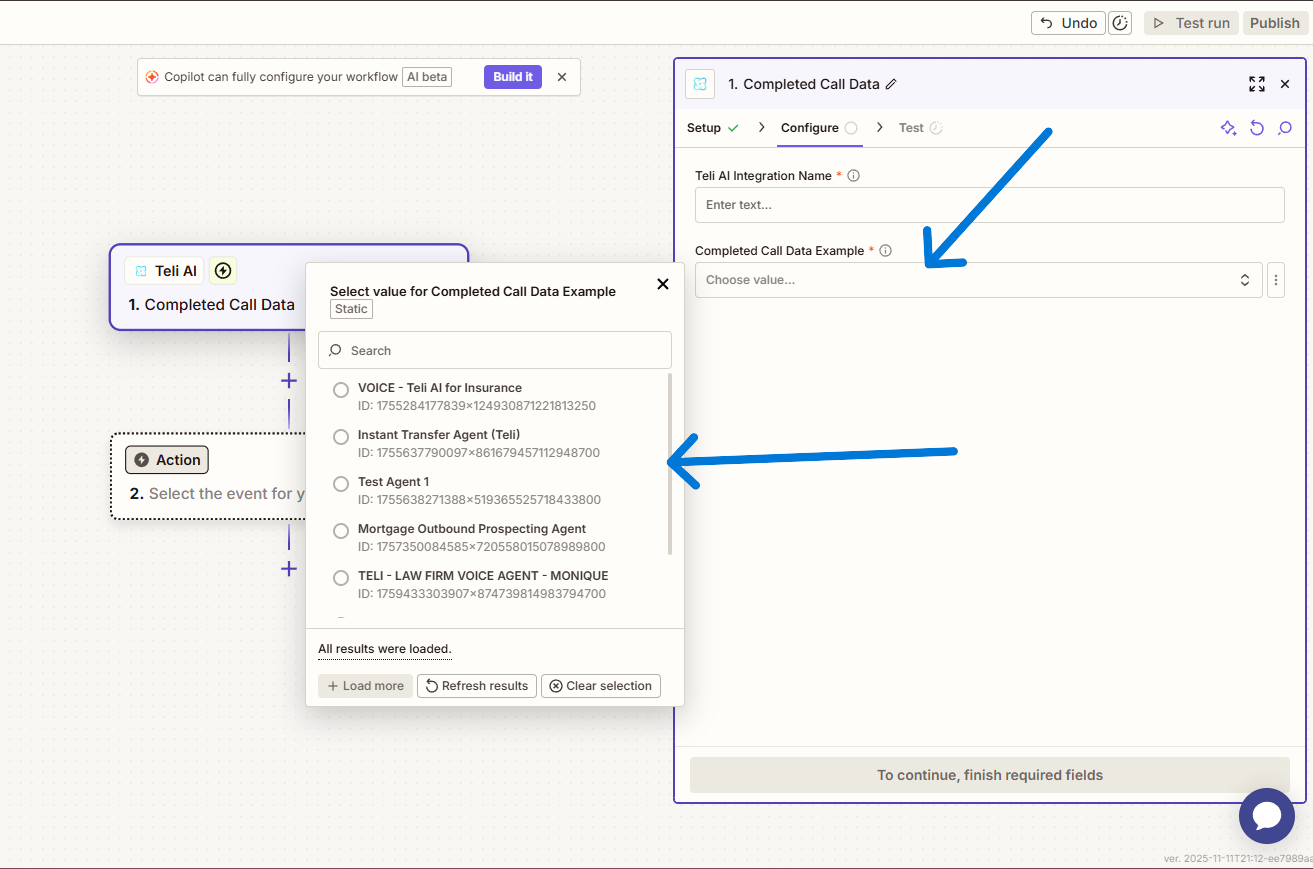
Step 6
Once you’ve named your integration and selected your voice agent click “Continue” at the bottom and you should now be in the “Test” tab. Click the “Test Trigger” button at the bottom. You should get an example payload. This is a full payload example for the selected agent for mapping your data for your next action. (Note: The example payload is not live data. It serves for mapping your data in Zapier only)
Step 7
Once you’ve selected your next Zapier action(s) and have published your zap, your integration should be available for activation in your Teli account for inbound, outbound and manual pushes.Inbound Example

Outbound Example

Manual Push
You can locate the manual push set up in the**“Call History”** tab. There should be a menu button in the top right corner of the**“Anlytics”** section. Click the 3 dots and menu should appear. Click “Connect CRM”. A popup should appear with a dropdown of your integration options.

